Make Sure to Subscribe to Our Newsletter ✉️
Get the latest news and updates straight to your inbox.

Disclosure: Our content is reader-supported. This means we may receive a commission if you click some of our links. Learn More, why it's important and how you can support us.
In This Article
If you’re thinking about starting a blog, you may wonder if it’s worth the effort. After all, there are already millions of blogs out there. Why create another one?
The answer is that there are many good reasons to start a blog. A blog can be a great way to monetize your writing, share your passions with the world, and build an audience for your work.
Plus, starting a blog is easy and inexpensive. All you need is a domain name and hosting. You can be up and running in minutes. So if you’ve been thinking about starting a blog, there’s no reason not to get started today.
If you want to create a Blog site. Congratulations! WordPress is a great answer for how to establish a blog, and we love blogs!
It’s also shockingly simple to set up a free blog. But, as simple as it is to get started with a WordPress blog, knowing what you need to do and how to accomplish it is still crucial.
So you don’t lose time on your journey to becoming a successful blogger. That is why we created this step-by-step instruction.
We’ll walk you through every step of setting up a blog using self-hosted WordPress. And we’ll do it with plenty of screenshots and simple directions. Start a blog right now!

A niche is a particular topic on which your blog will focus as well as your target audience. Furthermore, it will assist you in deciding on a blog name and developing a targeted blogging strategy.
Writing on books, travel, gaming, photography, and food are some blog speciality possibilities.
When starting a blog, it may be tempting to cover a wide range of topics. On the other hand, trying to master every subject is extremely tough and unsustainable. You may have a few successful posts, but your following will be dispersed, making it difficult to sustain a dedicated readership.
That is why it is critical to stick to a speciality that can give you a loyal audience. A loyal audience will eagerly await your next piece of content, providing a consistent supply of traffic to your blog.
Keep the following guidelines in mind when looking for the appropriate niche for your blog:
Choose a niche that you are interested in or passionate about. Writing about something you’re interested in will always be more gratifying than writing about something you’re not.
Consider your hobbies, interests, or subjects of interest. Make them more specific if possible.
Once you’ve decided on a niche, you can begin planning your blog’s Website. Securing web hosting and a domain name are two of the most crucial elements in getting any blog online.
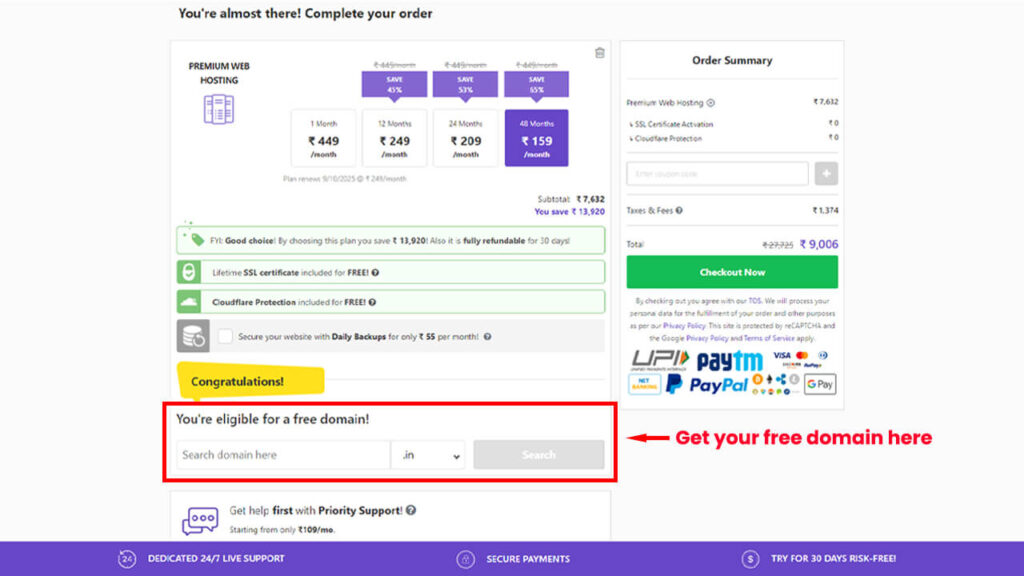
Web hosting is a service that allows you to publish a website and all of its files online so that others can view them. Purchasing hosting entails purchasing server space from a hosting provider, which grants you access to the resources required to construct and manage a blog.
Most web hosting companies, including Hostinger, (Hostinger Review) and Cloudways, (Cloudways Review) provide many types of blog hosting. Let’s have a look at two of the most popular blog hosting plan:
Shared hosting.
The cheapest type of hosting is where users share a single server’s resources on several websites. It’s ideal for small websites like personal blogs. Hostinger Shared hosting plans start at $1.99 per month or ₹69 per month.
After the hosting is set up, it’s time to get a domain name. A domain name is what visitors must type into the address bar to go to your Website. For example, hostinger.com is our domain name.
Purchase a personalized domain name from your preferred domain registrar. Some web hosting providers, such as Hostinger, also act as domain registrars. As a result, you can purchase both web hosting and a domain at the same time.

If you purchase hosting with Hostinger for a year or longer, you will also receive a free domain name for one year.
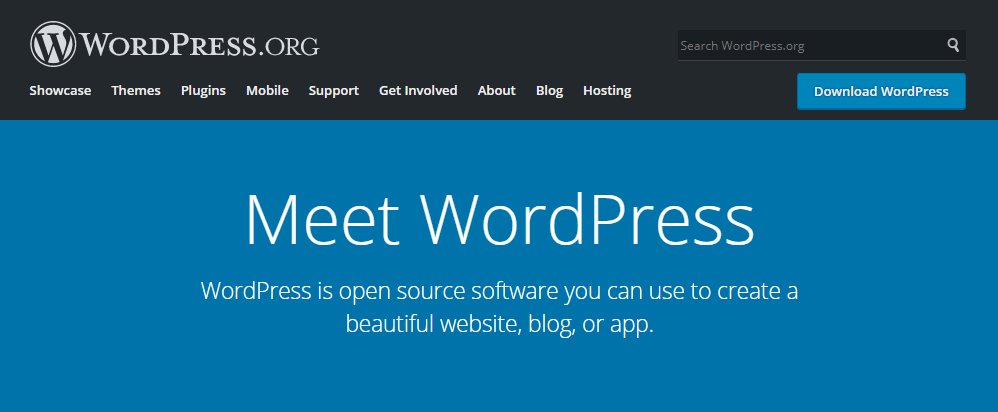
There are several blogging platforms to select from. However, for the most well-rounded experience, we recommend starting a blog with the WordPress self-hosted CMS, thus in this part, we will describe how to start a WordPress blog.
WordPress is one of the greatest CMSs available and an ideal platform for creating a blog. Although it can run practically any type of Website, it was originally built for blogging. As a result, WordPress includes many blog management tools and functions.
Despite the fact that WordPress has a higher learning curve than most website builders, there are numerous tools accessible to help users learn how to become a blogger more quickly. WordPress’s everyday management will become much easier once you’ve mastered it.
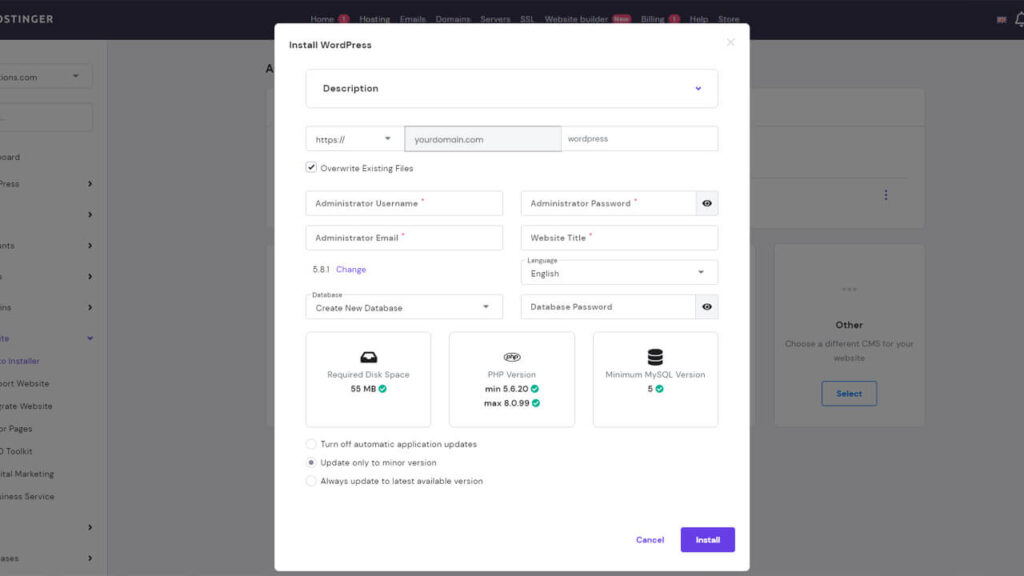
On Hostinger’s hPanel, follow these steps:
Go to Website -> Auto Installer.
Select WordPress from the drop-down menu.

A new window will be opened. Fill out the form with the following information:
Verify that your domain name is right.
Enter the Administrator Username, Password, and Email Address. This information will be used to gain access to your WordPress dashboard or admin area.
Enter the title of your Website. The name of the blog is normally written here. It can be altered later in the WordPress dashboard’s Site Identity settings.
Select your language preference.
Select Always update to the most recent version available to get the most recent features and security patches.
Choose Install.
Log in to your WordPress admin area when the installation is complete. You may start making modifications to your new blog right here.
This section will go through how to construct and configure a self-hosted WordPress blog. We’ll talk about WordPress themes and how to modify them. We’ll also talk about plugins and the pages your blog should have.
Decide on a Blog Theme
A WordPress theme is a pre-made design template that may be further modified. The WordPress library and third-party sources like ThemeForest include free and paid solutions. The official WordPress theme directory alone has around 8,400+ themes.
With premium themes, you can expect dedicated support, frequent updates, and premium plugins packaged with your purchase. Free WordPress themes may suffice for some popular sites, but they typically contain little to no support, making premium themes worthwhile.
There are many Themes and plugins Available on Wordpress.org. It isn’t very easy to determine which theme is best for your WordPress site, so we have a few suggestions, such as
Consider the following elements when searching for the best blog theme:
Pricing
These WordPress themes are lightweight and more flexible for your site
If you want to buy a premium theme, be sure it’s worth the money. Compare it to other comparable priced themes.
Appropriate design
The theme’s design should be appropriate for the content of your blog. When in doubt, always prefer basic designs that improve your blog content.
Features
Check to see whether the theme you desire has features like a drag-and-drop builder, predefined layouts, and customer assistance.
Responsiveness
Over 50% of all website traffic comes from mobile devices, so use an adaptable theme that will adjust to any screen size.
customer reviews
Read reviews of a theme before purchasing it to see if users have had good luck with it.
Log into your dashboard and go to Appearance -> Themes -> Add New to install a theme from the WordPress directory. Click Install after hovering over the desired theme. Activate it after the installation is complete.
When you choose Upload Themes and upload the theme’s.zip file, you can install and activate any theme you’ve downloaded from a third-party source.
Design Your Blog
It’s time to make more adjustments to the website design after activating your chosen theme.
As a general rule, strive for simplicity. Keep in mind that a blog’s content is its key selling point. Therefore, make sure that your visitors will have a good enough reading and browsing experience.
To give your blog the greatest appearance, take into account using the following advice:
For a more user-friendly design experience, install a drag-and-drop page builder plugin like Elementor, Brizy or Divi Builder.
Choose colour schemes, designs, and typefaces that enhance the user experience.
To make your blog material more engaging, include an image gallery.
Include a logo to help your blog’s brand stand out. There are several free logo creators accessible, so you don’t have to develop one from scratch or engage a graphic designer.
When appropriate, use icons instead of text. They improve the visual appeal of your Website. Social media buttons are an excellent example.
If you’re stuck, look into site design inspiration resources.
You can hire a web designer if you want to delegate the responsibility of designing your blog.
Extend functionality by installing plugins and tools.
A WordPress plugin is a piece of code that enhances a website’s functionality. Plugins add more functionality and are easily installed, changed, and uninstalled. Managing plugins does not necessitate any programming skills.
Different plugins fulfil various functions. Others handle backups, receive contact forms, filter comments, or integrate Google Analytics.
Check out the following important plugins:
Like themes, there are free and paid WordPress plugin options. Premium ones typically include additional features and support. Some plugins are freemium, which implies they include a free version with limited functionality that can be upgraded by purchasing the premium version.
Check the plugin’s user ratings and reviews first. Some plugins lack regular updates, essential features and also poorly written code. It’s safe to presume that a plugin with a high rating and a significant number of downloads will work properly.
We recommend installing only the necessary plugins, as having too many may cause your site to slow down. Keeping them all up to date will likewise be more difficult if you utilize shared hosting, and attempt to have up to five plugins running at once.
Log in to the dashboard and navigate to Plugins -> Add New to install a plugin. Browse or search for the plugin you want, then install and activate it.
Uploading a third-party plugin file is comparable to uploading a theme; select Upload Plugin.
Create the Mandatory Pages
Website pages include the site’s static content. Pages, as opposed to posts, require little to no editing or updating. The following are the most popular types of web pages:
Homepage.
It is the homepage of a website. When your visitors type your domain name into their browser’s address bar, this is what they will see. The homepage should feature excerpts from your greatest and most recent content.
About Page
It is the portion of a website where visitors may learn more about a company or Website. It may include a biography, the site’s goals, and representative images.
Contact Page.
This page provides contact information for the website administrator. A contact page typically includes an email address, a phone number, links to social network profiles, a contact form, or an address with a Google Maps location.
Different types of blogs may necessitate different types of pages. For example, if your blog includes an online store, you may need to add product pages to your Website.
To create a page, open the dashboard and navigate to Pages -> Add New. You will be transported to the WordPress text editor. Use it to compose and format the page’s copy, as well as to include relevant photos, videos, or forms.
Once your site has taken off, there will be opportunities to make money blogging. There are numerous methods for monetizing your blog. Here are some of the most general ways:
Affiliate marketing
Bloggers can earn money by becoming brand affiliates and employing affiliate links. When a blog visitor uses the affiliate link to make a purchase, the brand affiliate will earn a commission of 5-30% of the product’s sales price.
Paid advertisements
Bloggers can incorporate ad space on their Website by joining an ad network. Ad networks such as Google AdSense enable bloggers to connect instantly with firms relevant to their audience.
Sponsored content
Contact brands to see if you may get paid to write about their products. Before doing this, ensure your site has a sizable readership and traffic.
Physical and digital products
Create an eCommerce store for your blog and sell physical and digital things connected to your content. For example, sell digital products such as online courses and eBooks that go over your blog content in greater depth. Selling actual goods is another option worth considering.
User subscriptions
Create exclusive articles that visitors can access by subscribing to a particular membership site or a part of your blog. Maintain the value of the membership by providing unique, high-quality content on a regular basis.
Some Articles for you
If You are going to create a New WordPress Website, Here are some articles that will help you get started
Starting a blog can help you grow personally and professionally. Successful blogs are an excellent opportunity to supplement your income or even start your own business. The good news is that getting started with blogging is now more accessible and more affordable than ever.
In this article, we’ve outlined every step involved in starting a blog, from deciding what to write about to choosing a platform, creating content, and marketing and monetizing your site.
The goal of this article was to teach you how to create a blog, and we hope that it has done just that. In the comments box below, please ask any questions you may have.
Video Editing, Web Designing & Motion Graphics Intro, etc...
Join our subscriber’s list to get the latest news, updates directly in your inbox.